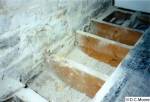
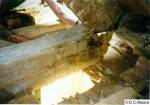
First floor joist end above a lath and plaster ceiling, into a party wall, affected by rot.
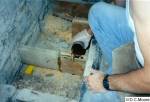
Slot cut from above, before the end was cut off, now being cleaned out with an auger.
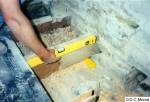
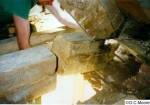
Timber-Resin Splice unit fitted with face sealant in place, being finally aligned.
Epoxy pouring grout used to fill the slot to at least above the top shear connector.
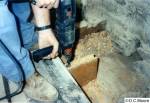
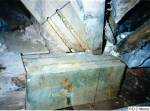
Damaged Tie Beam cut through, with rotted end visible.
Removing the decayed part, prior to drilling holes up the end grain.
Timber-Resin Splice unit in place, showing slots also cut into the principal rafter for shear connectors.
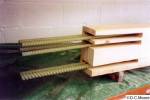
Side slotted Timber-Resin Splice showing shear connectors loosely placed.
A further view, illustrating the facility to fit several shear connectors in each slot; a matching set of slots has to be cut into the parent timber.